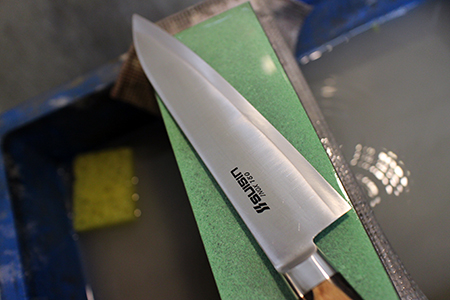
Gyuto and Hamaguri

I’ve been pondering and experimenting with Honbaduke for Western-style knives. It all started when I sharpened a double-edged blacksmith-made Nakiri knife, and I got curious about how this feeling would translate to stainless steel Western-style knives.
The Nakiri knife was crafted from carbon steel, and its hardness couldn’t be matched by stainless steel. Naturally, I couldn’t replicate the same results. When I tried sharpening stainless steel like carbon steel, it turned out all floppy and soft. (I knew it would, but I couldn’t resist the challenge!)
The only stainless steels that came close to the desired edge were V Gold 10 and 10A (although I haven’t tried them all, there might be others!). After practical testing that confirmed their strength and durability, I felt these could be used effectively!
Now, for the widely-used 8A stainless steel in Japan, I wondered how I could achieve a similar effect.
I wanted to thin the blade without sacrificing durability or cutting performance. How could I achieve both sharpness and strength for the knife? Then it hit me – Hamaguri edge plus Itohiki! Stay tuned for more updates on these experiments!
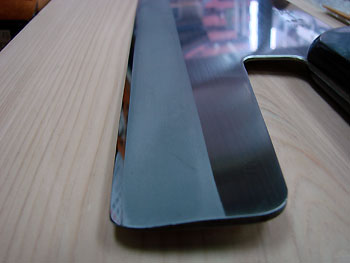
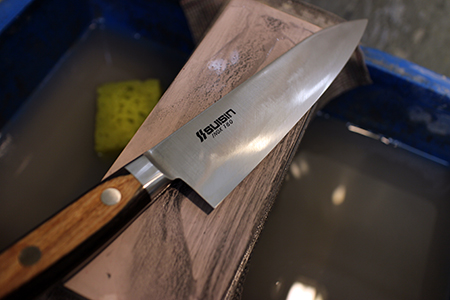
For starters, I tried sharpening it to resemble a single edge. However, I encountered an issue – the part where it transitioned into a Shinogi style didn’t have the desired cutting performance.
When I attempted to raise the Shinogi line further towards the edge, it made the tip too thin, so I had to exercise some patience!

So, to improve the blade’s cutting performance, I decided to grind away the part that had turned into a Shinogi-style edge. (Although you can’t see it in the photos, some Shinogi is still there, but it should give a smoother cutting experience.)
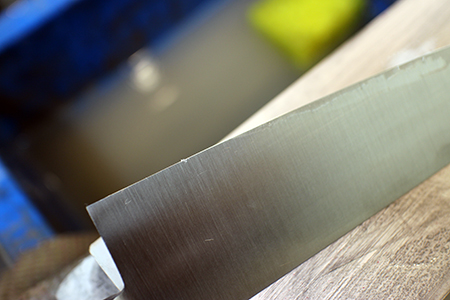
Ideally, I would go through the usual steps of using a medium grit stone followed by a finishing stone to get rid of any grind marks. But due to time constraints, I went straight to the finishing stone! Well, as expected…
the grind marks didn’t disappear, haha. They’re at the level where you can see some shine.
If I were to use a buffing wheel or something similar, it would clean up nicely, though (^^).
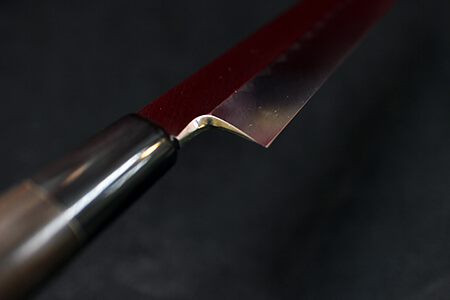
Now, let’s talk about the backside…
I used a robust Itohiki edge at a 45-degree angle to support the thinness from the front. You might think this angle would get in the way of slicing, but it’s a measure to balance cutting ability and strength. It can even help prevent minor chipping!
I admit it might look a bit unfinished, but even in this state, it seems ready for some functional testing through sharpening. So, I’ll take it home and put it to the test!
- 2015-07-28