Resharpening usuba Knives
Hello!
I had an amazing experience trying the Fugu Tempura Donburi! It was, of course, a specialty of Uedaya.
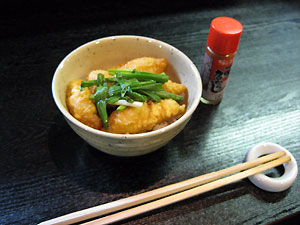
Although it was incredibly delicious, I feel like I’ve been writing about food a lot lately in my blog posts. So, to bring back the essence of a knife artisan’s blog, I want to share a bit about resharpening a “Kama-gata Usuba” knife that was brought in for repair.
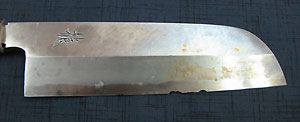
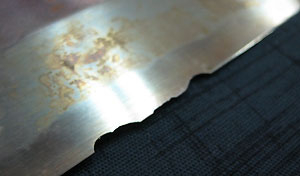
It seems that the knife got damaged while cutting frozen food. Dealing with such tasks using a single-edged thin blade can be quite challenging!

The damage is minor, but it needs to be addressed properly.
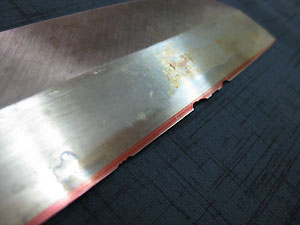
The blade along the red line will have to be discarded. It’s a shame, but there’s no other option (><)b
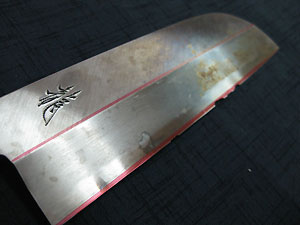
The key is to narrow the cutting edge and raise the Shinogi line. To maintain the same level of sharpness as when it was new, raising the Shinogi line is necessary.
However, since the owner of this knife uses it at home, I decided not to raise the Shinogi line.
I decided to refine the blade by making it thinner, adding a fine edge, and finishing it with an ‘itohiki’ for better cutting performance and a ‘hamaguri’ shape.
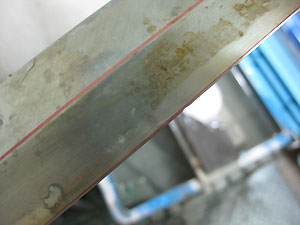
I start by removing the damaged area using a coarse sharpening stone. As seen in the photo, some damage remains. If I don’t properly address it here, it will cause problems in the next steps. Even though it’s tough and I don’t want to remove too much, it’s important to take care of it thoroughly at this stage.
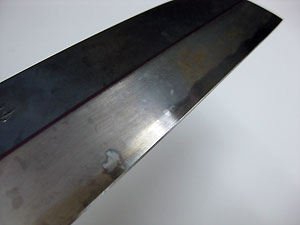
It has an extremely steep double-beveled edge, almost resembling a Deba knife (laughs). From this state, I will extend and thin out the blade towards the tip.
It is also possible to remove the damage by using the traditional method of sharpening (grinding the cutting edge to create a convex edge, known as ‘kaeri’), which is effective. However, considering factors such as the wear and deformation of the sharpening stone, the desire to maintain the original shape, and the time it takes, I personally believe that it is better to completely sharpen the blade and remove the damage all at once.
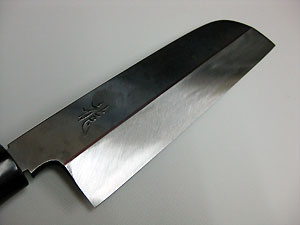
First, we’ll start with a coarse sharpening stone.
While leveling the blade from the shinogi line to the tip, we will gradually thin out the edge and eliminate the extreme double-beveled shape through sharpening.
It’s important to be cautious with the coarse sharpening stone to avoid excessive reduction of the knife’s material.
If you notice even a slight ‘kaeri’ forming, it’s best to stop and not continue sharpening.
If you continue sharpening despite the ‘kaeri,’ it may alter the shape of the knife.
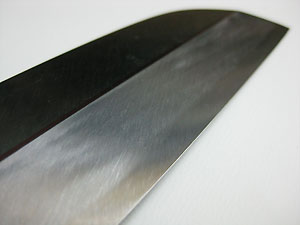
To achieve a ‘Hamaguri’ shape for the blade, I will embed the ‘Hamaguri’ curve at this stage. By sharpening only the steel part with a slightly inclined angle (tilted angle), I will create a thin ‘shinogi’ line within the cutting edge. However, if I make this angle too extreme, it may affect the knife’s cutting performance.
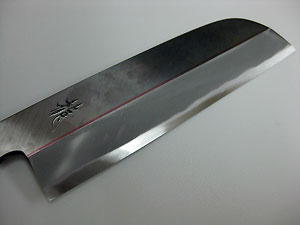
From that state, when I gently place the medium sharpening stone flat from the shinogi line to the tip, it does not make contact with the blade’s edge (the part where the ‘Hamaguri’ curve was created)… This is the expected result as I am changing the sharpening angle.
The blade area that is not touched by the medium sharpening stone naturally retains the rough sharpening stone’s texture. When sharpening with the medium sharpening stone, it is important to avoid crushing the ‘shinogi’ line of the cutting edge. By sharpening while adjusting the angle between the soft iron part and the steel part, and using the medium sharpening stone for the finishing touch, I will roll and sharpen the ‘Hamaguri’ section
Rolling” may evoke an image of a wavy motion, but in reality, it is a subtle adjustment that may not be noticeable unless pointed out. Please feel it out with your own intuition.
Note: Maintaining a straight blade edge is essential.
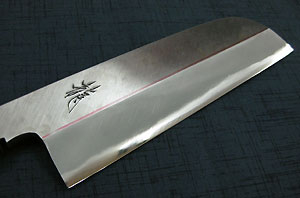
I will only apply a finishing stone to the blade edge to achieve Kasumishimo. Originally, it is easier to create contrast because there is ‘shinogi’ within the cutting edge. I will gradually apply the finishing stone only to the blade edge to add contrast. This is purely for visual appeal, so feel free to customize it to your liking.
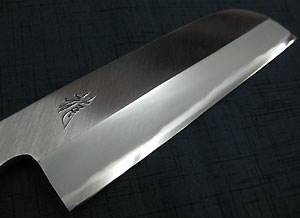
The knife itself was quite dirty! (Perhaps it had rust or oil stains?) So, I cleaned it thoroughly using a cleanser and a polishing rod. Having a knife that shines brightly is desirable, even without a mirror finish, right? It would make the customers happy too, seeing a sparkling knife♪
I polished the flat side and the back side to make them clean. Unfortunately, I couldn’t completely remove the light rust, but it’s a remarkable recovery!
Finally, I applied Itohiki during the final edge alignment, and it’s complete~~♪
Used sharpening stones:
Coarse stone: GC#220
Coarse stone: Diamond #500
Medium stone: King Standard #1000
Finishing stone: Kitayama #8000
Used for Itohiki: Arashiyama #5000
- 2010-04-27
